Within the Special Education (SPED), an Individualized Education Program (IEP) document follows a structured revision process to ensure compliance and consistency.
An IEP Revision Document is but a revised version of an existing IEP document.
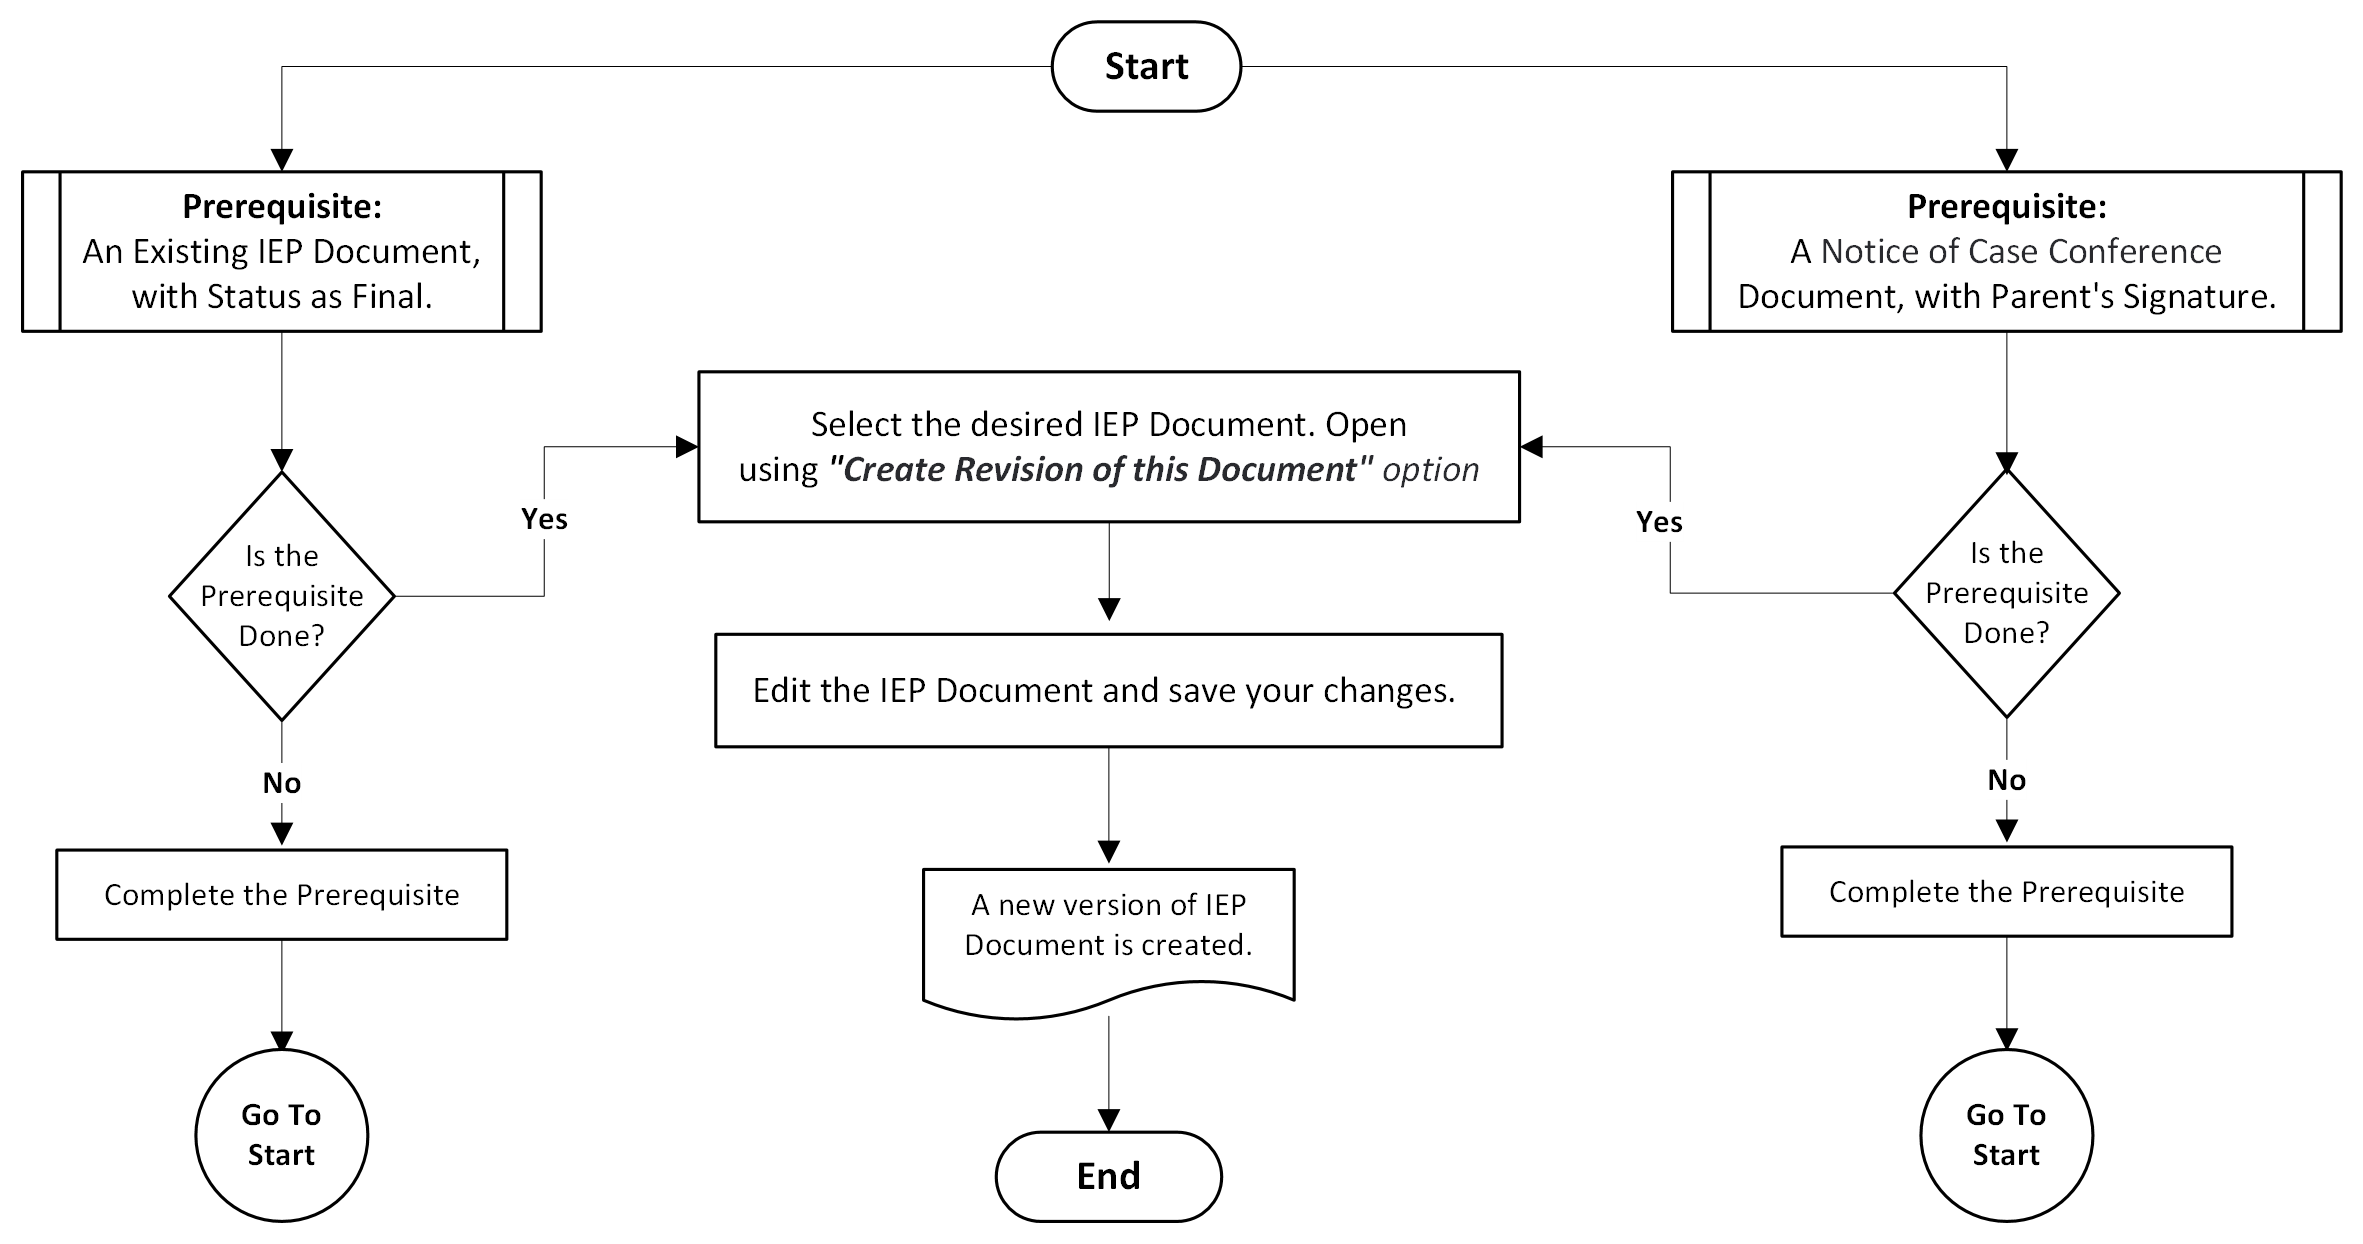
Creating a Revision of an Existing IEP Document
-
Go to Student Profile, then click on My Home Page, and finally click on Documents.
-
From the drop-down list, open the IEP document.
-
Click ‘More…’, and select Create Revision of this Document.
-
In the dialog box, add a Label, if necessary.
-
Click Ok.
-
If the ‘Notice of Case Conference’ is not Signed or not created, you will see a warning message.
-
If ‘Notice of Case Conference’ is not Signed: “Before creating an IEP revision, you must obtain the parent's agreement and secure their signature on the Notice of Case Conference.“
-
If ‘Notice of Case Conference’ is not Created: “There must be a Notice of Case Conference created and the parent's agreement“.
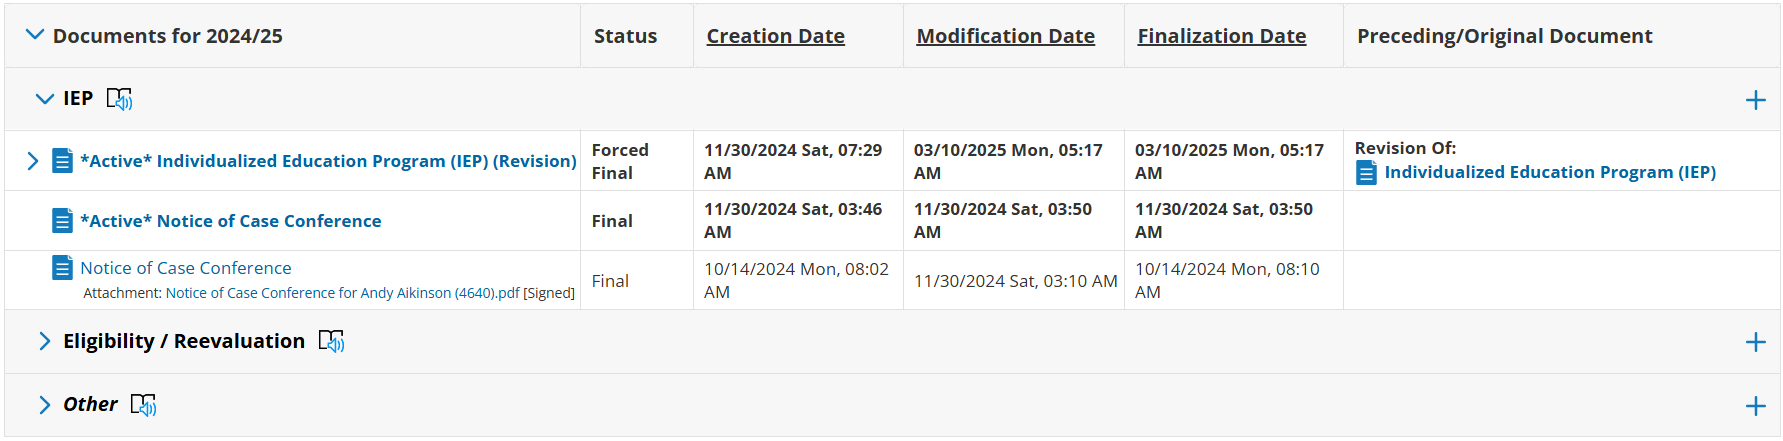
Accessing an existing Revised IEP Document
-
Go to Student Profile, My Home Page, and then click on Documents.
-
From the drop-down list, open the IEP document. The table would list all related IEP documents for the specified school year.
-
Click the revised version of the IEP Document.
All the ‘Revised IEP Documents’ can be identified by a ‘(Revision)’ as the suffix in their file names.
Also, when the document is opened, the name is displayed as ‘Individualized Education Program - Revision’