Snippets are a feature that allows a system administrator with HTML and database skills to make limited customizations to document templates without deviating from the underlying state or province model.
Snippets are fragments of content that can be inserted at specific points in existing document sections, and which can incorporate custom fields that the system administrator adds to the document template. An important constraint of snippets is that they can only be inserted at the beginning of a section, end of a section, or at other preset insertion points in the state or province model.
To develop a snippet, the feature must be enabled in your database by PowerSchool. Additionally, skill with HTML is required. Each snippet created will have a "Deployed" checkbox property that controls whether the snippet is deployed to end users yet. Deployed snippets immediately appear in non-final documents, while final documents are unaffected. Care must be taken when using this feature, since an improperly designed snippet may have an adverse effect on end users. It will be helpful to review the previous section in this guide, which explains how to navigate to the configuration for a document template and view the configuration for each section. As per the previous section, sign in as a system administrator and navigate to the configuration of the document template for which you want to add a snippet.
Customize a Document Template with a Snippet
-
Log in as the Security Administrator, and then select Administration > Configuration.
-
Click the Document Templates tab.
-
Switch to the section to be customized with a snippet. Typically, a snippet is used to introduce one or more custom data fields into the target section.
-
To add custom fields, select Data Field from the Add Field drop-down menu as shown here. If this drop-down menu is not available, you are not authorized, or the feature may not be enabled in your database.
Warning: If you will be adding custom fields, it is best to do this after peak hours or there may be a risk of end users receiving timeout errors while the fields are being added.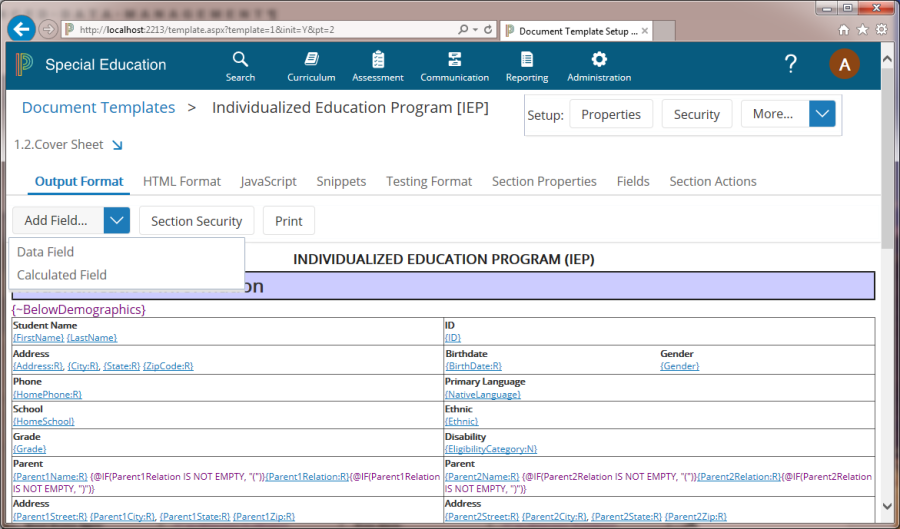
-
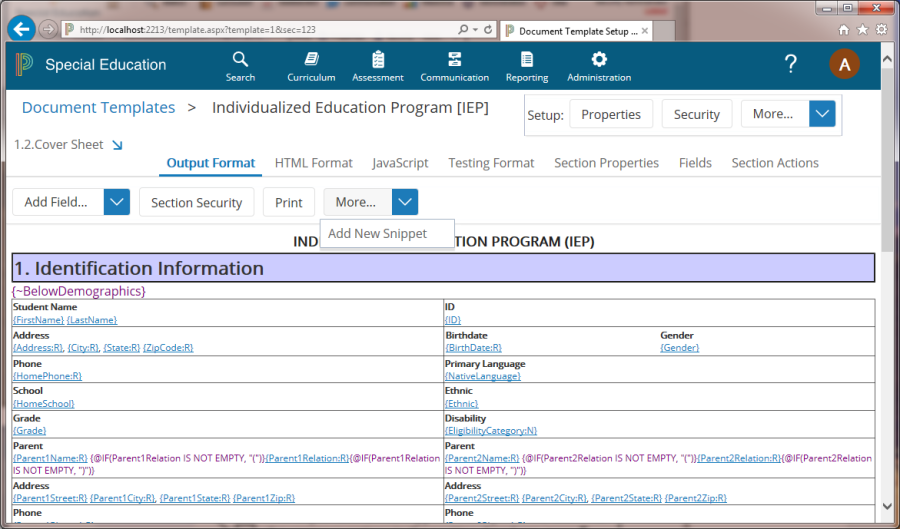
To add the new snippet, which can reference any custom field(s) you added, select Add New Snippet from the More drop-down.
-
Indicate the snippet position.
-
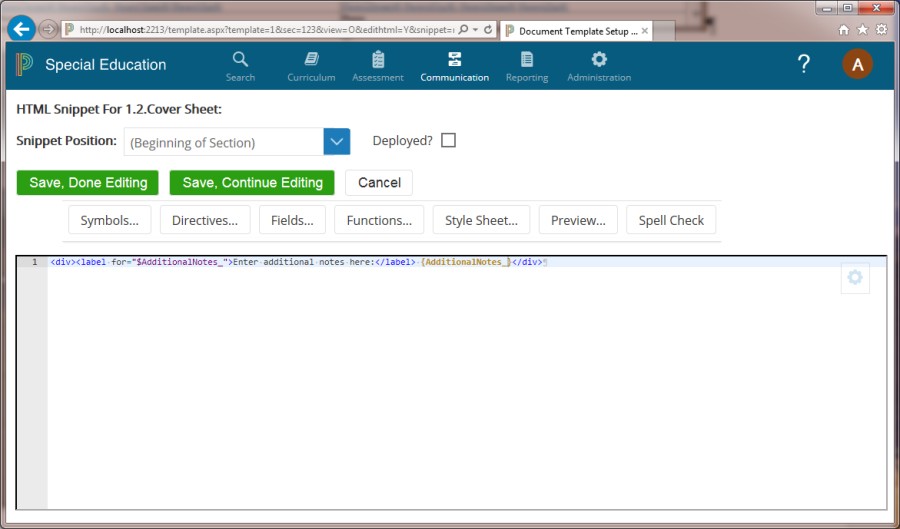
Enter the snippet content which is HTML with form directives embedded in the HTML. It is assumed you have some expertise with HTML. Full coverage of directives is beyond the scope of this guide; however, you can embed a custom field as follows:
-
Place a "field directive" with the syntax {fieldname} where you want your custom field to be. Do not forget that your custom field was required to end with an underscore character. See below for additional information and options for field directives.
All fields should be labeled to meet accessibility standards. Follow the example in the screen shot to see how the AdditionalNotes_ field was labeled. Note the dollar ($) sign inside of the label tag's "for" attribute. This helps the form generator correctly associate the label tag with the field directive no matter how the field is presented.
About field directives-
The basic field directive has the syntax {fieldname}. However, there are cases where you will want to add additional modifiers to the field directive to control the appearance of the field, using the format {fieldname:modifiers}. Below are examples:
-
You can control the width of a single line text box using the format {fieldname:Wwidth} where width is the approximate number of average character widths, for example {Comment:W25}. You can also specify the width as a percentage of the available space, for example {Comment:W95%}.
-
You can control the width and height of a multi-line text box using the format {fieldname:WwidthHheight} where width is the approximate number of character widths and height is the number of lines, for example {Comments:W25H5}. You can also specify the width as a percentage of the available space, for example {Comments:W95%H5}.
-
You can have the system automatically generate a label for the field using the T modifier, for example {NeedsAccomodations:T}, or you can specify the text of the label inline using {NeedsAccomodations:T"Accomodations"}. This is especially handy for checkbox style fields.
-
If a field is presented as checkboxes, but you would prefer a dropdown field, use the D modifier, for example {NeedsAccomodations:T"Accomodations"D}.
-
-
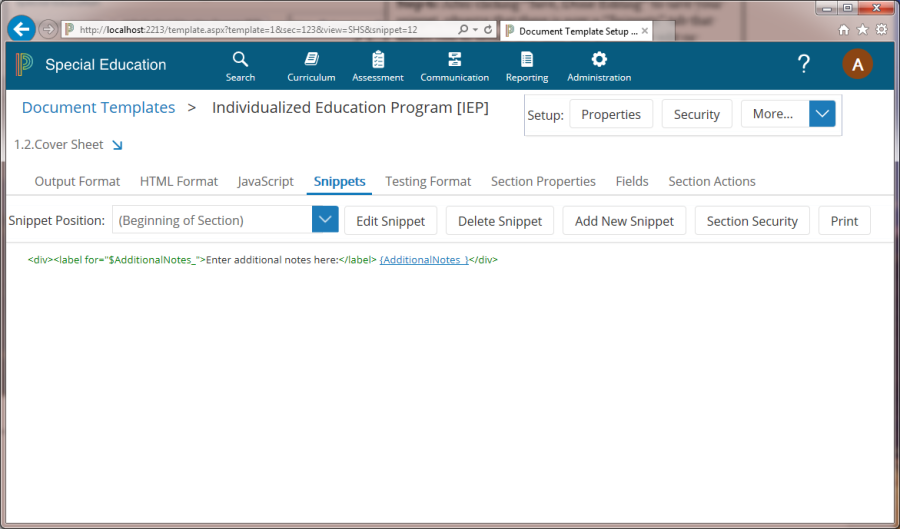
After clicking Save, Done Editing to save your snippet, observe that there is now a Snippets tab that allows you to return to it later and potentially edit or delete it.
Your snippet will not actually appear to end users until you edit the snippet and enable the Deployed? checkbox. Upon deployment, be sure to go into a sample non-final document and test it out.