
All student documents are accessible via the Documents tab, but you can also view and manage the documents associated with a specific workflow case for a student using the Workflow Cases tab. For each workflow case, you can view, add, and remove documents.
View documents in a workflow case
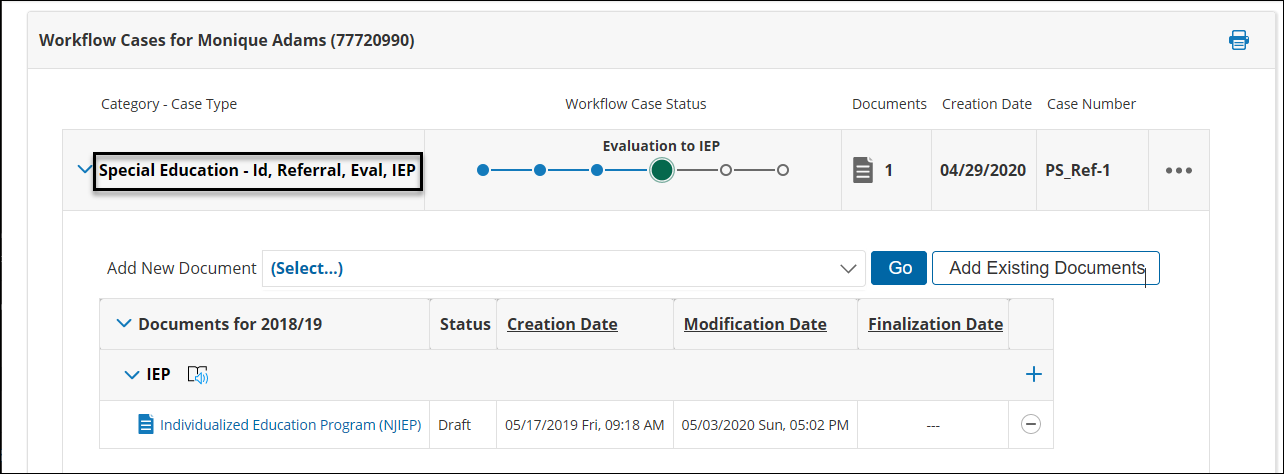
Click a workflow case title to expand the section that shows the documents in the workflow case.
When you click a Document link to view a document, you can use the navigation path link to return to the Workflow Cases tab.
Add new documents to a workflow case
There are two ways you can add new documents to an existing workflow case:
-
Select from the full list of documents in all categories using the Add New Document option.
-
Select from a filtered list of documents in a specific category using the Plus icon in a category heading row.
Select from the full list of documents in all categories
-
Click the Add New Document drop-down list, and select the document you want to add to the case.
-
Click Go.
-
In the New Document dialog box, do one of the following:
-
Enter a Label/Comment for the document, and click the Additional settings >> link to set up any other available options in the new document setup dialog.
-
Click New to start filling out the new form.
-
Select from a filtered list of documents in a specific category
-
In the category heading for the type of document you want to add, click the Add (plus sign) icon.
-
In the New Document dialog box, click the Create New Document drop-down list, and select the document you want to add to the workflow case.
-
Click Go.
To remove the filter and show the full list of documents in all categories, select Show All Categories, and click the Create New Document drop-down list.
Add existing documents to a workflow case
-
Click Add Existing Documents.
-
Select the existing documents you want to add to the workflow case, and click Add.
Remove documents from a workflow case
When you remove a document from a workflow case, you are not deleting the document. It will still be available in the Document list, but it will no longer be associated with the workflow case.
-
In the row for the document you want to remove from the workflow case, click the Remove (minus sign) icon in the last column.
-
In the confirmation dialog box, click Remove.